Getting Started
In this article
This article describes the basics of TestCafe for readers with zero prior TestCafe experience. It requires basic familiarity with JavaScript, the web, and the command line.
- What is TestCafe?
- Install TestCafe
- Create a new test
- Add test actions
- Add a success condition
- Run the test
- View test results
- What’s next?
What Is TestCafe?
TestCafe is an end-to-end testing framework for web applications. TestCafe runs on Node.js. TestCafe supports all three major operating systems — Linux, Windows, and macOS.
You can use TestCafe to simulate common user scenarios in major desktop browsers, cloud browsers, and on mobile devices. If your website malfunctions, TestCafe reports can help you diagnose the issue.
Install TestCafe
Main article: Install TestCafe
Prerequisites
TestCafe requires a recent version of the Node.js platform. Run the following command to confirm that your setup includes Node.js:
node --version
The best way to install the TestCafe framework is to use npm — the most popular Node.js package manager. The NPM repository hosts ready-to-use builds of the framework. Confirm that your setup contains an up-to-date version of the package manager:
npm --version
Installation
Run the following command to install the testcafe package from npm:
npm install -g testcafe
Create a new test
Main article: Test Structure
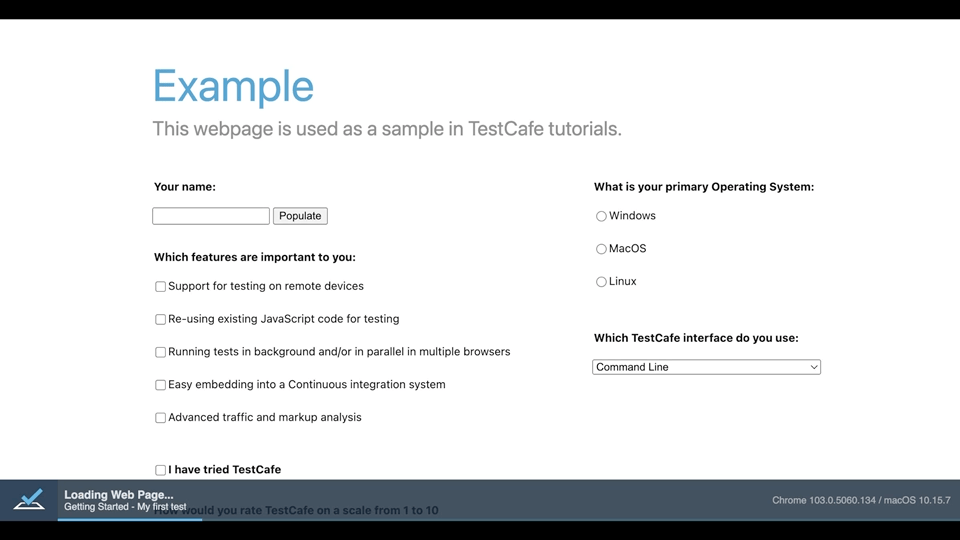
Let’s create a simple test for the TestCafe demo page.

TestCafe tests are Node.js scripts. Create a new TypeScript or JavaScript file, and open the file in the text editor.
TestCafe test files consist of fixtures and tests. A fixture is a groups of tests that share the same starting URL. Invoke the
fixturekeyword to create a new fixture.fixture('Getting Started')Use the page method to set the starting URL of the fixture.
fixture('Getting Started')
    .page('https://devexpress.github.io/testcafe/example');
Finally, declare a new test with the
testmethod.fixture('Getting Started') .page('https://devexpress.github.io/testcafe/example'); test('My first test', async t => { // Test code goes here });
Add test actions
Main article: Test Actions
Let’s add two simple actions to the “My first test” test function.
Action 1: Type text
The first action — t.typeText — populates the #developer-name input field with a dummy name:
await t.typeText('#developer-name', 'John Smith');
The first argument is a CSS Selector that identifies the target element (#developer-name). The second argument contains the input value (John Smith).
Action 2: Click the button
The second action — t.click — clicks the “Submit” button:
await t.click('#submit-button');
This action requires a single argument — a CSS Keyword that identifies the target element.
Chain multiple actions
Let’s chain these actions together. Action chains make your code easier to read.
fixture('Getting Started')
    .page('https://devexpress.github.io/testcafe/example');

test('My first test', async t => {
    await t
        .typeText('#developer-name', 'John Smith')
        .click('#submit-button');
});
Add a success condition
Tests without an explicit success condition are inconclusive.
If one of the following errors occurs, the test automatically fails:
- TestCafe cannot reach the test page URL.
- TestCafe cannot perform a test action — for example, if the target element does not exist.
- Your website throws a JavaScript error.
But you still don’t know if test actions have had the desired effect. That’s why you should add assertions (custom success conditions) to your test.
When you submit the form, the application should open a page that greets the user by name. Let’s use an assertion to compare the actual value of the greeting to our expectations.
1. Create an assertion
Main article: Assertions
Assertions are functions that compare page data to your expectations. Assertions allow you to create custom success conditions — if an assertion fails, the test fails, too. Add the following assertion to your test:
await t.expect(x).eql(y);
This assertion compares the value of x to the value of y, and succeeds if they are equal.
2. Specify the actual header value
Main article: Element Selectors
Replace the x with the header’s actual value. Use a Selector query to extract this data from the page.
Import the
Selectorclass in the beginning of the test file:import { Selector } from 'testcafe';Place a Selector query into the left-hand side of the assertion:
await t.expect(Selector('#article-header').innerText).eql(y);The
#article-headerCSS Selector identifies the Selector target. TheinnerTextmethod retrieves the element’sinnerTextproperty.If the application is slow to respond, and the Selector query fails at first, TestCafe employs the Smart Assertion Query Mechanism to ensure test stability.
Note
You can use Selector queries to extract page data at any point in the test, not just inside Assertions. Read the Element Selector guide for more information.
3. Specify the expected header value
Replace y with the header’s expected value:
await t.expect(Selector('#article-header').innerText).eql('Thank you, John Smith!');
4. Add the assertion to the action chain
import { Selector } from 'testcafe';

fixture('Getting Started')
    .page('https://devexpress.github.io/testcafe/example');

test('My first test', async t => {
    await t
        .typeText('#developer-name', 'John Smith')
        .click('#submit-button')
        .expect(Selector('#article-header').innerText).eql('Thank you, John Smith!');
});
Now that you have a working success condition, the test is complete.
Run the Test
Main article: Run tests
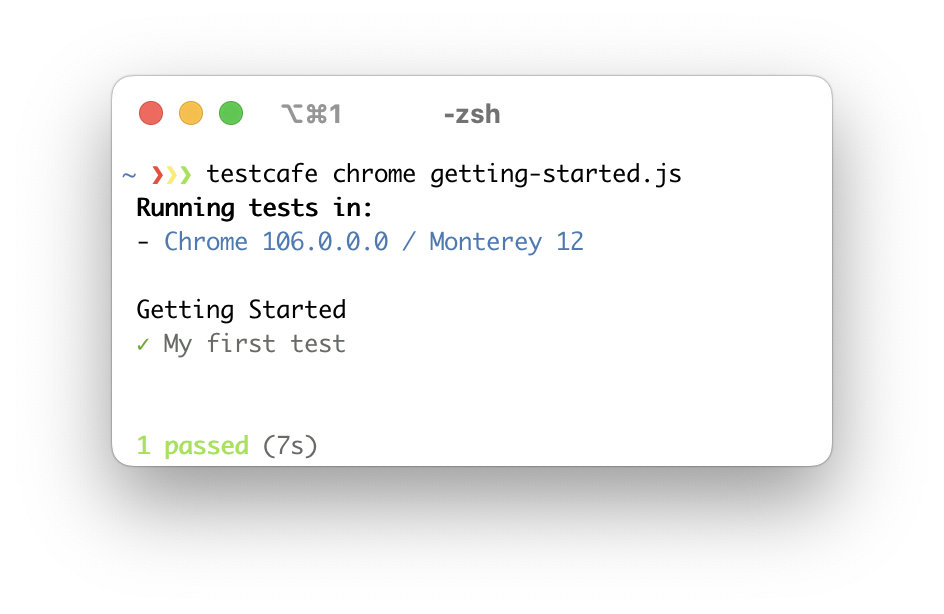
The easiest way to run TestCafe tests is to use the command line interface.
Specify the target browser and test file path. TestCafe opens the selected browser and starts test execution.
testcafe chrome getting-started.js
Reload tests on the fly
TestCafe can reload tests as you edit them. Enable live mode to take advantage of this capability:
testcafe chrome getting-started.js --live
Important
You can interact with other applications while TestCafe runs your tests. However, do not switch away from the browser tab that runs the test or minimize the browser window. Inactive tabs and minimized browser windows may trigger a resource saving mode, which harms the test’s performance.
Do not zoom pages while testing. Tests may lose stability when you zoom the page in and out.
View Test Results
Main article: Reporters
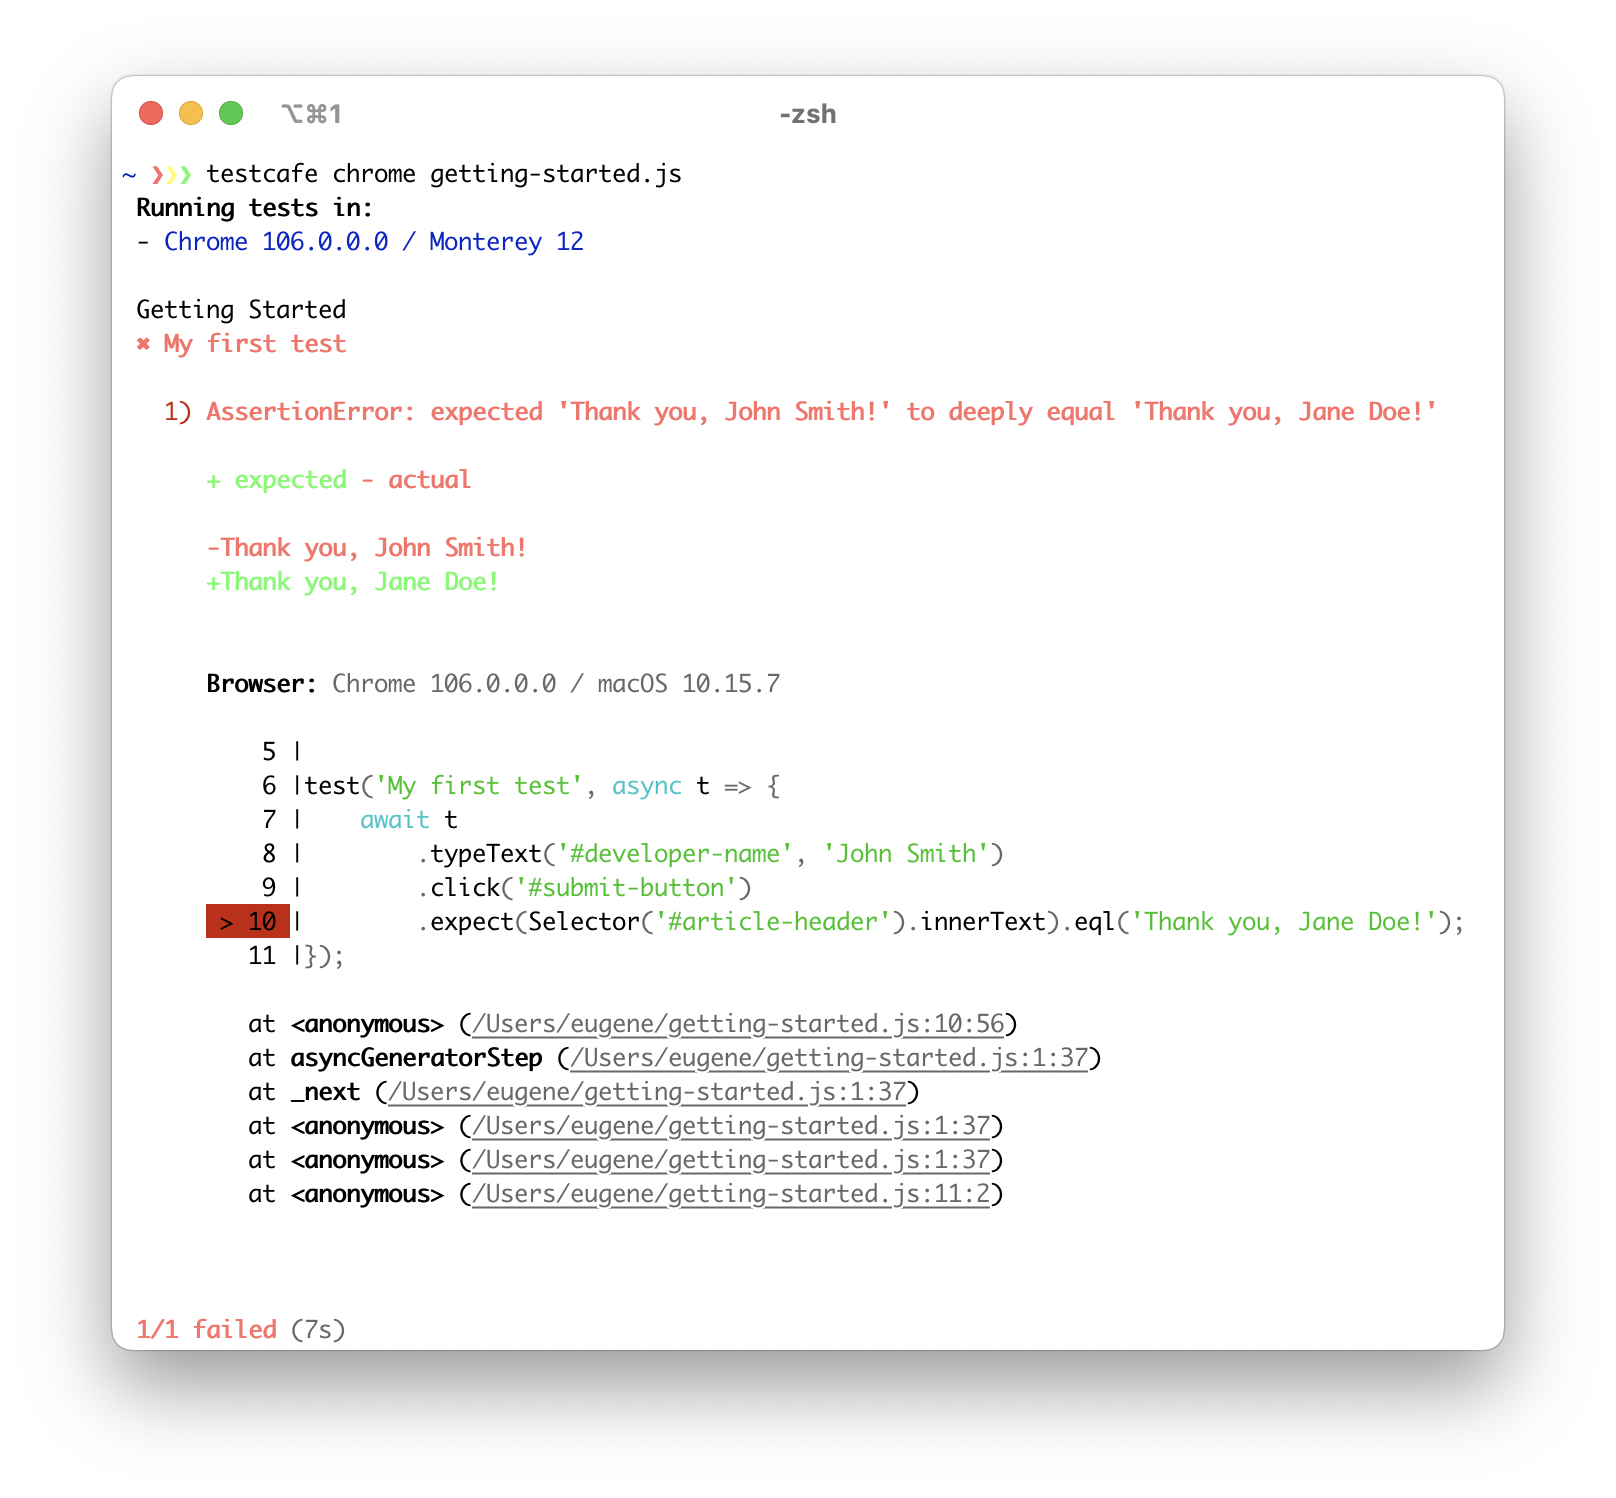
TestCafe outputs real-time test results to the console.
If a test fails, TestCafe outputs the error and highlights the failed action:
What’s Next?
- Add more test actions. For example, navigate to a different page, or take a screenshot.
- Use Element Selector queries to extract new information from the page.
- Use Client Functions to run custom client-side code and return its value.
- Send HTTP Requests to your back-end server.
- Learn how to troubleshoot common test issues.
The following Basic Guides offer a deeper look at basic TestCafe capabilities: