Integrate TestCafe with GitLab
This topic describes how to integrate TestCafe tests into a GitLab project’s build process.
GitLab has a built-in continuous integration service. Refer to the GitLab documentation for more information.
To run tests with TestCafe, you need a virtual machine with Node.js, TestCafe and browsers. You can use a TestCafe Docker image with pre-installed software.
However, if you already have a Docker image prepared to deploy your web application and run tests, you can install TestCafe on this image before testing.
Option 1 - Use TestCafe Docker Image
Open the .gitlab-ci.yml file that stores the GitLab CI configuration. If this file does not exist, create it in the repository’s root directory.
Create a new job. To do this, add the following settings to .gitlab-ci.yml at the top level:
e2e_tests:
  image:
    name: testcafe/testcafe
    entrypoint: ["/bin/sh", "-c"]
  script:
    - /opt/testcafe/docker/testcafe-docker.sh firefox:headless,chromium:headless tests/**/*
e2e_tests- the job’s name.image- Docker image settings.name- the TestCafe image’s name. You can find it on Docker Hub.entrypoint- overrides the image’s ENTRYPOINT and sets it as/bin/sh. You should specify this setting because the TestCafe image’s defaultENTRYPOINTis set to thetestcafecommand and GitLab usesshto run test scripts. The-cflag indicates that the subsequent argument is a command rather than a script.script- the command that runs TestCafe tests./opt/testcafe/docker/testcafe-docker.shpoints to a script that prepares the environment to run a browser and starts TestCafe. Its arguments are standard TestCafe command line parameters.
See Configuration of your jobs with .gitlab-ci.yml for more information about the .gitlab-ci.yml syntax.
Commit .gitlab-ci.yml and push the changes to the repository. This creates a new job that any GitLab Runner can execute.
Option 2 - Install TestCafe on a Docker Image
You can install TestCafe from npm before tests are run if you use a Docker image that does not have TestCafe pre-installed.
First, add TestCafe to your project development dependencies. Open the repository root and execute the following command:
npm install --save-dev testcafe
This installs the latest TestCafe version locally and adds it to the devDependencies section in the package.json file.
{
    "devDependencies": {
        "testcafe": "*"
    }
}
The test run command that uses TestCafe should be also added to package.json to the scripts section because TestCafe is installed locally.
{
    "scripts": {
        "test": "testcafe chrome:headless tests/**/*"
    },

    "devDependencies": {
        "testcafe": "*"
    }
}
This allows you to use npm test to run tests.
Finally, open .gitlab-ci.yml (or create it in the repository root) and add a job that installs TestCafe and runs tests.
e2e_tests:
  # Replace '10.14' with the latest Node.js LTS version
  # available on Docker Hub
  image: circleci/node:10.14-browsers
  before_script:
    - npm install
  script:
    - npm test
e2e_tests- the job’s name.image- the Docker image’s name. This job uses an image with Node.js and popular browsers provided by CircleCI. Replace10.14with the desired Node.js version. You can find the list of available versions on the image’s page on Docker Hub.before_script- defines a command to run before tests start. Install TestCafe at this stage.script- the command that runs TestCafe tests.
Commit .gitlab-ci.yml and package.json, then push the changes to the repository.
View Test Results
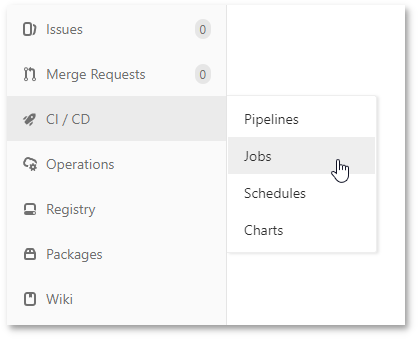
Go to your project page. In the right-side panel, hover over the CI/CD category and click Jobs.
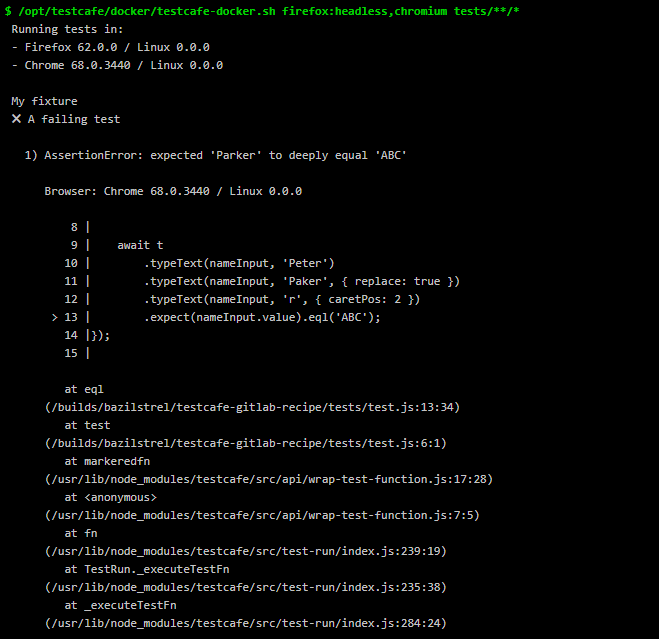
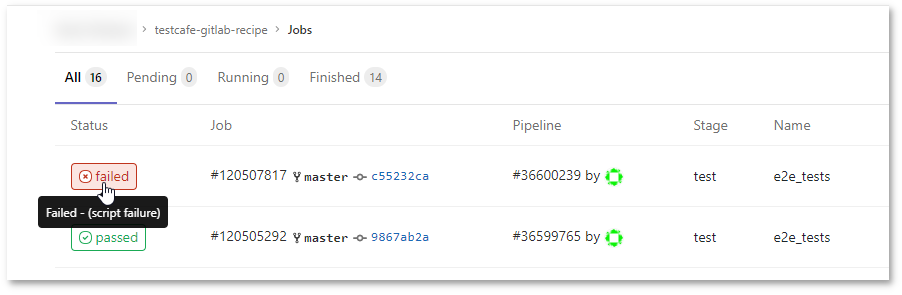
The Jobs page displays a list of all recently executed jobs. Click a job’s status to view its details.
On the detail page, you can see a job log with the TestCafe report.