Configuration File
Create a configuration file to use the same TestCafe settings across multiple test runs.
TestCafe supports two configuration file formats: JavaScript and JSON. On launch, TestCafe looks for a configuration file (.testcaferc.js, .testcaferc.cjs, or .testcaferc.json) in the current working directory.
Use a JavaScript configuration file (.testcaferc.js) to make the most of TestCafe. Define hook functions, reference Node.js modules, and perform server-side calculations:
//.testcaferc.js or .testcaferc.cjs

let os = require("os"); // Import any Node.js module you want.

module.exports = { // Settings go inside the module.exports statement.
    src: "/home/user/tests/", // Tests
    browsers: ["chrome", "firefox"], // Browsers
    baseUrl: "https://my-website.com", // URL
    skipJsErrors: true, // Ignores JavaScript errors
    hostname: os.hostname() // Node.js dynamically calculates the value of this parameter.
}
JSON is the original TestCafe configuration file format with fewer capabilities:
// .testcaferc.json
{
    src: "/home/user/tests/",
    browsers: ["chrome", "firefox"],
    baseUrl: "https://my-website.com",
    skipJsErrors: true,
    hostname: "localhost",
}
Important
Command line options and TestCafe Runner options have precedence over configuration file settings. When TestCafe overrides a configuration file setting, it outputs a description of the conflict to the console.
Table of Contents
- Configuration file formats
- Configuration file setup
- Browsers
- Advanced browser settings
- Test files
- Filter tests and fixtures by name, metadata, or function
- Reporters
- Base URL
- Screenshots and videos
- Debugging settings
- Timeouts
- Automation settings
- TypeScript settings
- User variables
- Client scripts
- Custom actions
- Hooks
- CLI output settings
- Initialization settings
Configuration file formats
JavaScript
JavaScript configuration files store settings in key-value pairs within a module.exports statement. JavaScript configuration files can reference JavaScript methods, functions, and variables. This advantage allows users to create dynamic configuration files.
To access Node.js modules inside your configuration file, use the require syntax of the CommonJS standard.
Note
TestCafe configuration files do not support ESM syntax.
If your JavaScript project is of type module, use the .cjs configuration file extension.
Read the TestCafe v2.6.0 announcement for more information.
//.testcaferc.js or .testcaferc.cjs

let os = require("os"); // Import the 'os' module

module.exports = {
    src: "/home/user/tests/", // Test files
    browsers: ["chrome", "firefox"], // Browsers
    baseUrl: "https://my-website.com", // Website URL
    skipJsErrors: true, // Skip JavaScript errors
    hostname: os.hostname()
}
You can use JavaScript configuration files to perform the following tasks:
- Filter tests by function.
- Define custom actions.
- Define global test hooks.
- Define global request hooks.
- Define reporter hooks.
JSON
JSON configuration files store settings in key-value pairs. You can use JavaScript object identifiers as keys, enclose strings in single quotes, and insert inline comments. TestCafe suppoprts the full JSON5 standard specification.
// .testcaferc.json
{
    skipJsErrors: true,
    hostname: "localhost",
    // other settings
}
The TestCafe GitHub repository includes a sample JSON configuration file.
Configuration file setup
Location and name
On startup, TestCafe looks for a configuration file (.testcaferc.js, .testcaferc.cjs or .testcaferc.json) in the current working directory. To store the configuration file elsewhere, or to use a different file name, set one of the following options:
- The
--config-filecommand line option - The
configFileoption of the TestCafe Runner API
Configuration file priority
TestCafe uses one configuration file at a time.
- If you manually set the path to the configuration file, TestCafe loads that configuration file.
- If you don’t specify a custom configuration file path, TestCafe searches the current working directory for a configuration file with the default name and a supported extension, in the following order:
.testcaferc.js.testcaferc.cjs.testcaferc.json
- If TestCafe cannot find a configuration file with the default name (
.testcaferc) and extension (js,cjs,orjson), it does not load any configuration files.
Import Node.JS modules and properties
Note
TestCafe configuration files do not support ESM syntax.
If your JavaScript project is of type module, use the .cjs configuration file extension.
Read the TestCafe v2.6.0 announcement for more information.
Use the CommonJS require syntax to access Node.js modules inside your JavaScript configuration file:
// testcaferc.js
let os = require("os"); // Import the entire module
let myModule = require ("/my-module.js") // Import a module by path
let { property } = require ("module") // Import a specific property from the module
Browsers
Main article: Browsers
Use the browsers parameter to select browsers for the test run.
Important
When you launch TestCafe v3.0.0 and up, the framework engages Native Automation mode to automate Chromium-based browsers with the native CDP protocol.
If your browser selection includes other browsers, TestCafe disables native automation.
If you want to run tests in non-Chromium-based browsers and take advantage of Native Automation, create two separate test runs:
testcafe chrome,edge test.js;
testcafe firefox,safari test.js --disable-native-automation
- Local browsers
- Local browsers with a custom path
- Cloud browsers, custom browsers, remote browsers
- Headless mode, emulation mode, user profiles
Local browsers
TestCafe detects compatible local browsers on startup.
To launch a local browser, pass the browser alias to the browsers property:
{
    "browsers": "chrome"
}
To launch multiple local browsers, pass an array of browser aliases to the browsers property:
{
    "browsers": ["ie", "firefox"]
}
To launch tests in every detected browser, specify the all alias:
{
    "browsers": "all"
}
Local browsers with a custom path
Specify the path to a custom browser executable with the path: prefix. Escape special characters and spaces with backslashes:
{
    "browsers": "path:`C:\\Program\ Files\\Mozilla\\firefox-beta.exe`"
}
To specify CLI options alongside the path parameter, pass an object to the browsers parameter:
{
    "browsers": {
        "path": "/home/user/portable/firefox.app",
        "cmd": "--no-remote"
    }
}
Cloud browsers, custom browsers, remote browsers
To run tests in browsers that require a browser provider plugin, prefix the browser alias with the name of the plugin:
{
    "browsers": "saucelabs:Chrome@52.0:Windows 8.1"
}
To run tests in remote browsers, specify the remote browser alias. Specify the number of browsers after the colon. If you use concurrency, multiply the number of unique remote browsers by the concurrency factor.
{
    "browsers": "remote:4"
}
Note
Disable native automation to launch tests in mobile browsers, cloud browsers, and remote browsers.
Headless mode, emulation mode, user profiles
To run tests in headless mode, enable a user profiles, or use Chrome device emulation, append the corresponding keyword to the browser alias.
Note
If you specify a custom path to the browser executable, you cannot take advantage of this capability.
{
    "browsers": ["firefox:headless", "chrome:emulation:device=iphone X"]
}
Other interfaces
CLI: Browser List
API: runner.browsers, BrowserConnection
Advanced browser settings
- Use the concurrency parameter to run multiple browser instances concurrently.
- Use the qrCode parameter to generate QR codes for remote connection URLs.
concurrency
Increase the value of the concurrency parameter to run multiple instances of the same browser simultaneously. Read the Concurrent Test Execution guide for more information.
Note
Concurrent test execution is not suitable for tests that can only run in a certain order. To override this setting for a particular fixture, use the disableConcurrency fixture method.
{
    "concurrency": 3
}
CLI: -c, --concurrency
API: runner.concurrency
qrCode
TestCafe can run tests in remote browsers. If you enable the qrCode parameter, TestCafe outputs QR codes with remote connection URLs to the command line.
{
    "qrCode": true
}
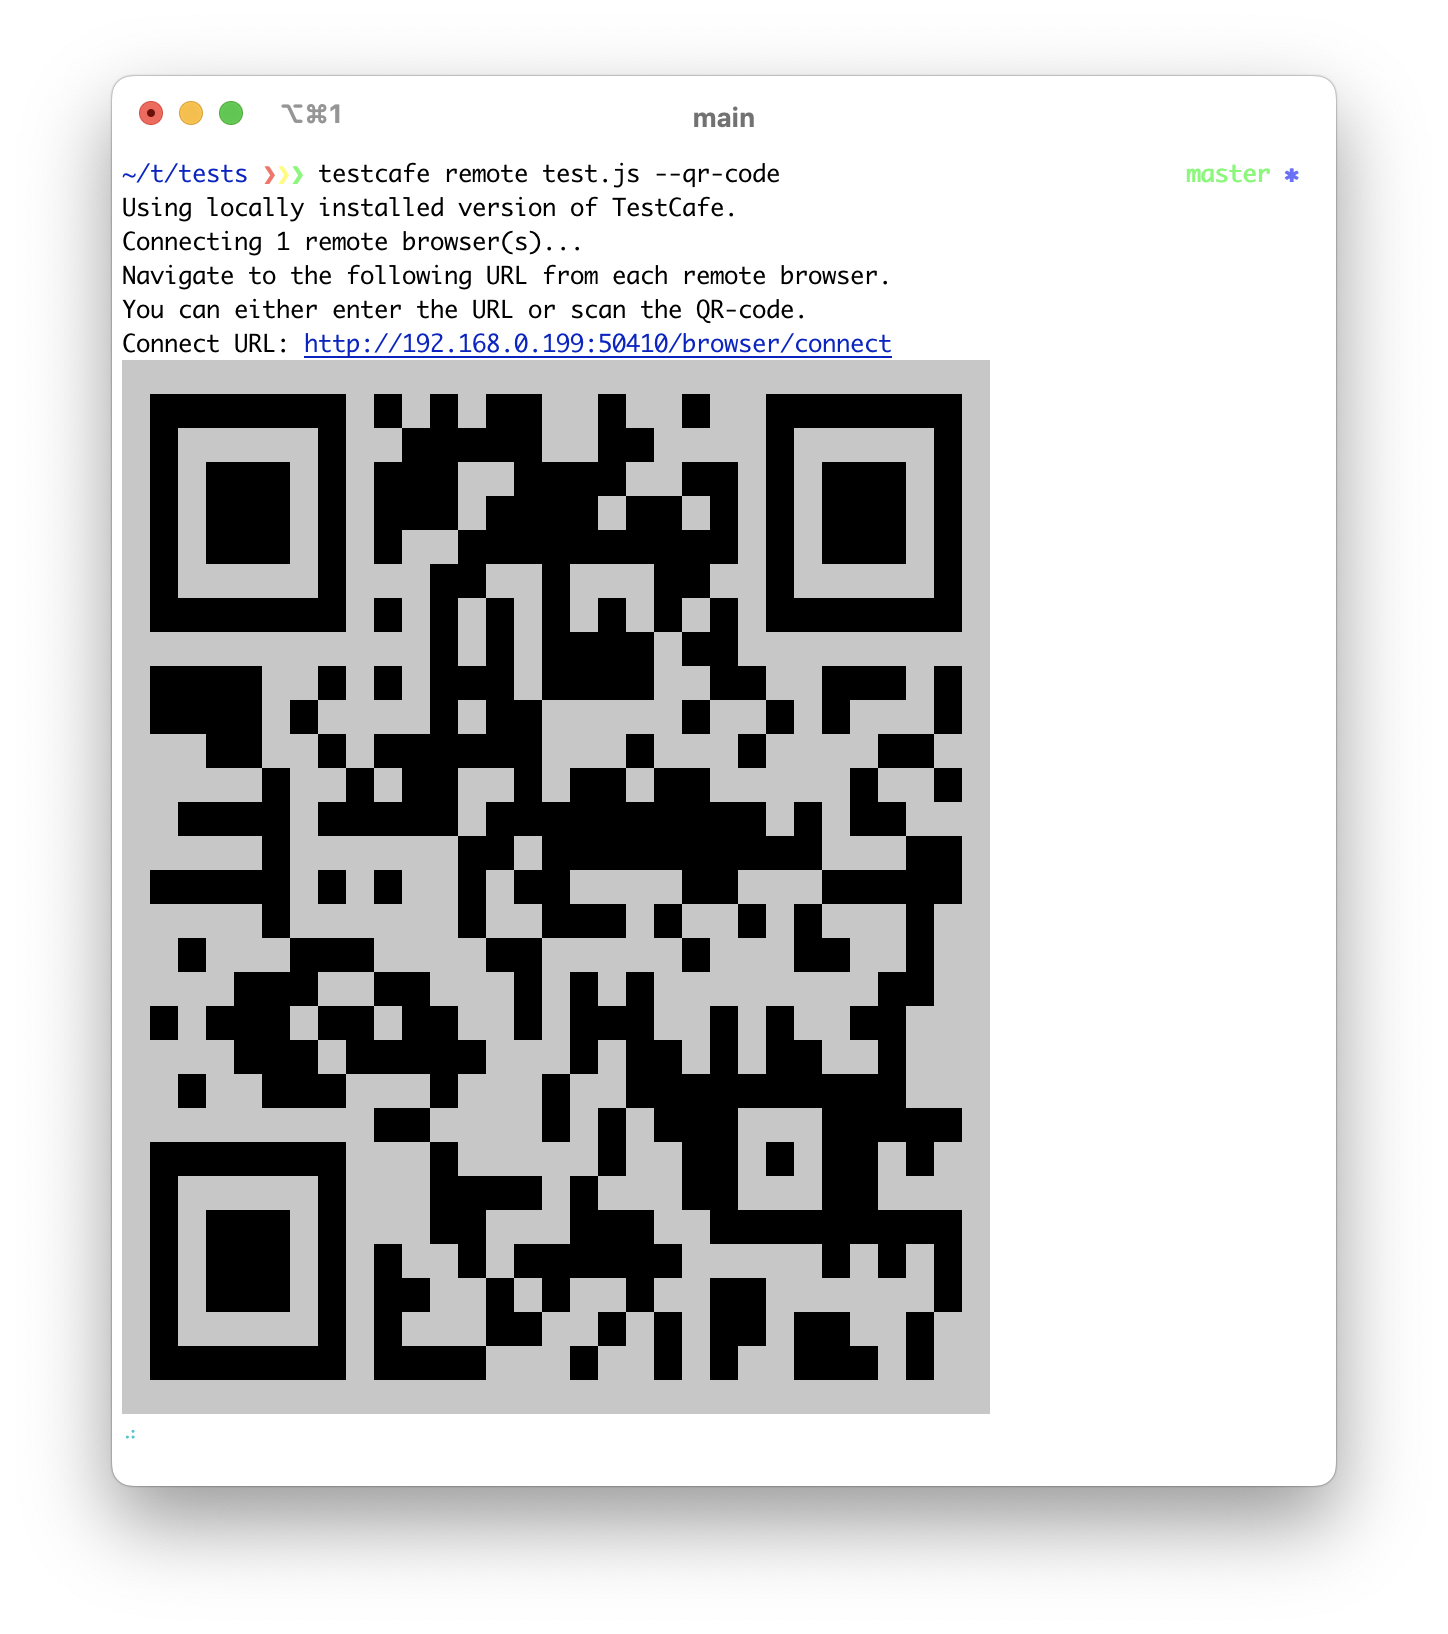
CLI: --qr-code
Test files
The TestCafe framework supports the following test file formats:
- JavaScript
- TypeScript
- CoffeeScript
- TestCafe Studio tests (
.testcafefiles).
You can filter tests and fixtures by name, metadata, or function.
Pass a string to the src parameter to specify a single test file or folder:
{
    "src": "/home/user/tests/fixture.js"
}
Pass an array to the src parameter to specify multiple test files or folders:
{
    "src": ["/home/user/auth-tests/fixture.testcafe", "/home/user/mobile-tests/"]
}
Alternatively, specify a set of files with a glob pattern:
{
    "src": ["/home/user/tests/**/*.js", "!/home/user/tests/foo.js"]
}
CLI: Specify test files
API: runner.src
Filter tests and fixtures by name, metadata, or function
Main article: Metadata and Filtering
Use the filter parameter in conjunction with one of its options to filter tests and fixtures by name or metadata. If you use a JavaScript configuration file, you can filter tests by function.
Example:
{
    "filter": {
        "test": "Click a label"
    }
}
CLI: -t, --test
API: runner.filter
Filter tests by function
Important
This capability requires the use of a JavaScript configuration file.
To filter tests by function, pass the function directly to the filter parameter.
module.exports = {
    filter: (testName, fixtureName, fixturePath, testMeta, fixtureMeta) => {
    return fixturePath.startsWith('D') &&
        testName.match(someRe) &&
        fixtureName.match(anotherRe) &&
        testMeta.mobile === 'true' &&
        fixtureMeta.env === 'staging';
    });
}
The filter function accepts the following arguments:
- testName
- fixtureName
- fixturePath
- testMeta
- fixtureMeta
Filter tests by name
Define the test option to run a test with the specified name.
{
    "filter": {
        "test": "Click a label"
    }
}
CLI: -t, --test
API: runner.filter
Filter tests by grep pattern
To filter tests by grep pattern, pass a Basic Regular Expression to the testGrep option:
{
    "filter": {
        "testGrep": "Click.*"
    }
}
CLI: -T, --test-grep
API: runner.filter
Filter fixtures by name
Define the fixture option to run a fixture with the specified name.
{
    "filter": {
        "fixture": "Sample fixture"
    }
}
CLI: -f, --fixture
API: runner.filter
Filter fixtures by grep pattern
To filter fixtures by grep pattern, pass a Basic Regular Expression to the fixtureGrep option:
{
    "filter": {
        "fixtureGrep": "Page.*"
    }
}
CLI: -F, --fixture-grep
API: runner.filter
Filter tests by metadata
Define the testMeta option to filter tests by metadata.
The example below instructs TestCafe to run tests that meet the following requirements:
- The value of the
devicemetadata property ismobile. - The value of the
envmetadata property isproduction.
{
    "filter": {
        "testMeta": {
            "device": "mobile",
            "env": "production"
        }
    }
}
CLI: --test-meta
API: runner.filter
Filter fixtures by metadata
Define the fixtureMeta option to filter fixtures by metadata.
The example below instructs TestCafe to run tests that meet the following requirements:
- The value of the
devicemetadata property ismobile. - The value of the
envmetadata property isproduction.
{
    "filter": {
        "fixtureMeta": {
            "device": "mobile",
            "env": "production"
        }
    }
}
CLI: --fixture-meta
API: runner.filter
Reporters
Main article: Reporters
Specify the reporter parameter to select a test reporter:
{
    "reporter": "list"
}
If you don’t specify the output option, the reporter outputs data to stdout. Specify the output option to save reporter data to a file:
{
    "reporter": {
        "name": "xunit",
        "output": "reports/report.xml"
    }
}
You can use multiple test reporters simultaneously. However, only one reporter at a time can output data to stdout. Define the output option for each subsequent reporter:
{
    "reporter": [
        {
            "name": "spec"
        },
        {
            "name": "json",
            "output": "reports/report.json"
        }
    ]
}
If you use a JavaScript configuration file, you can configure reporter hooks.
CLI: -r, --reporter
API: runner.reporter
Base URL
The baseURL parameter defines the starting URL of every fixture and test in your test suite. Additionally, the option enables you to use relative Role URLs.
To override this setting, use the fixture.page and test.page methods.
{
    "baseUrl": "https://devexpress.github.io/testcafe"
}
CLI: --base-url
API: run.baseUrl
Screenshots and Videos
Main article: Screenshots and Videos
The following options have been deprecated in TestCafe v1.5.0 and higher:
screenshots
Use the screenshots parameter to specify screenshot settings.
screenshots.path
The path option specifies the screenshot storage folder:
{
    "screenshots": {
        "path": "/home/user/tests/screenshots/"
    }
}
CLI: --screenshots path
API: runner.screenshots
screenshots.takeOnFails
Enable the takeOnFails option to take screenshots on test failure.
{
    "screenshots": {
        "takeOnFails": true
    }
}
CLI: --screenshots takeOnFails
API: runner.screenshots
screenshots.pathPattern
Set the pathPattern option to define a custom naming pattern for screenshot files:
{
    "screenshots": {
        "pathPattern": "${DATE}_${TIME}/test-${TEST_INDEX}/${USERAGENT}/${FILE_INDEX}.png"
    }
}
CLI: --screenshots pathPattern
API: runner.screenshots
screenshots.pathPatternOnFails
Set the pathPatternOnFails option to define a custom naming pattern for screenshots taken on test failure.
If you set both the pathPattern option and the pathPatternOnFails option, the latter takes precedence in the event of test failure.
{
    "screenshots": {
        "pathPatternOnFails": "${DATE}_${TIME}/failedTests/test-${TEST_INDEX}/${USERAGENT}/${FILE_INDEX}.png"
    }
}
CLI: --screenshots pathPatternOnFails API: runner.screenshots
screenshots.fullPage
Enable the fullPage option to capture screenshots of the entire page.
{
    "screenshots": {
        "fullPage": true
    }
}
CLI: --screenshots fullPage
API: runner.screenshots
screenshots.thumbnails
Enable the thumbnails option to generate thumbnail copies of every screenshot.
{
    "screenshots": {
        "thumbnails": false
    }
}
CLI: --screenshots thumbnails
API: runner.screenshots
disableScreenshots
If you set the disableScreenshots parameter to true, TestCafe ignores the t.screenshot() action and the takeOnFails parameter.
{
    "disableScreenshots": true
}
CLI: --disable-screenshots
API: runner.run({ disableScreenshots })
videoPath
Main article: Record Videos
Set the videoPath parameter to record videos of test runs and store them in the specified directory.
{
    "videoPath": "reports/screen-captures"
}
CLI: --video
API: runner.video
videoOptions
Note
The videoOptions parameter has no effect unless you enable video recording with the videoPath parameter.
Specifies video recording options. See the Record Videos guide for the full list of available options.
{
    "videoOptions": {
        "singleFile": true,
        "failedOnly": true,
        "pathPattern": "${TEST_INDEX}/${USERAGENT}/${FILE_INDEX}.mp4"
    }
}
CLI: --video-options
API: runner.video
videoEncodingOptions
Note
The videoEncodingOptions parameter has no effect unless you enable video recording with the videoPath parameter.
Specifies video encoding options. Refer to the FFmpeg documentation for the full list of available options.
{
    "videoEncodingOptions": {
        "r": 20,
        "aspect": "4:3"
    }
}
CLI: --video-encoding-options
API: runner.video
screenshotPath (deprecated)
Deprecated in favor of screenshots.path.
TestCafe v1.4.X and lower does not enable screenshots out of the box. The screenshotPath parameter allows you to enable screenshots and specify the path to the screenshot storage location.
{
    "screenshotPath": "/home/user/tests/screenshots/"
}
takeScreenshotsOnFails (deprecated)
Deprecated in favor of screenshots.takeOnFails.
If you use TestCafe v1.4.X or lower, enable the takeScreenshotsOnFails parameter to take screenshots on test failure.
{
    "takeScreenshotsOnFails": true
}
screenshotPathPattern (deprecated)
Deprecated in favor of screenshots.pathPattern
If you use TestCafe v1.4.X or lower, set the pathPattern parameter to define a custom naming pattern for your screenshots:
{
    "screenshotPathPattern": "${DATE}_${TIME}/test-${TEST_INDEX}/${USERAGENT}/${FILE_INDEX}.png"
}
Debugging settings
Main article: Debug Tests
- quarantineMode
- debugMode
- debugOnFail
- stopOnFirstFail
- skipJsErrors
- skipUncaughtErrors
- developmentMode
- retryTestPages
quarantineMode
Main article: Quarantine Mode
Enable quarantine mode to eliminate false negatives and detect unstable tests. TestCafe quarantines tests that fail and repeats them until they yield conclusive results.
{
    "quarantineMode": true
}
CLI: -q, --quarantine-mode
API: runner.run({ quarantineMode })
quarantineMode.successThreshold
The number of successful test attempts necessary to confirm success. The option value should be greater than 0. The default value is 3.
{
    "quarantineMode": {
        "successThreshold": 2
    }
}
CLI: -q successThreshold=N, --quarantine-mode successThreshold=N
API: runner.run({ quarantineMode: { successThreshold: N } })
quarantineMode.attemptLimit
The maximum number of test execution attempts. The value of this option should exceed the value of the successThreshold option. The default value is 5.
{
    "quarantineMode": {
        "attemptLimit": 3
    }
}
CLI: -q attemptLimit=N, --quarantine-mode attemptLimit=N
API: runner.run({ quarantineMode: { attemptLimit: N } })
debugMode
Main article: Debug Tests
Enables debug mode.
{
    "debugMode": true
}
Note
When TestCafe uses native automation, the browser registers page events in debug mode.
CLI: -d, --debug-mode
API: runner.run({ debugMode })
debugOnFail
Enable the debugOnFail parameter to enter debug mode on test failure.
{
    "debugOnFail": true
}
CLI: --debug-on-fail
API: runner.run({ debugOnFail })
stopOnFirstFail
Stops the entire test run if one test fails.
{
    "stopOnFirstFail": true
}
CLI: --sf, --stop-on-first-fail
API: runner.run({ stopOnFirstFail })
skipJsErrors
Main article: Skip JavaScript Errors
TestCafe tests fail when a page yields a JavaScript error. Specify the skipJsErrors parameter to ignore JavaScript errors.
Important
Errors are signs of malfunction. Do not ignore errors that you can fix.
If a page outputs unwarranted error messages, modify your application to prevent this behavior.
Use the skipJsErrors option to silence errors that you cannot act upon.
Skip all JavaScript errors
If you don’t specify additional options, TestCafe ignores all JavaScript errors:
{
    "skipJsErrors": true
}
Skip JavaScript errors by message, URL, and stack
Specify options to filter errors by string or regular expression.
Warning
Enclose regular expressions in forward slashes to avoid strict matches for special characters.
- If you specify the
messageoption, TestCafe ignores JavaScript errors with messages that match the regular expression:{ "skipJsErrors": { "message": /.*User ID.*/ig } } - If you specify the
pageUrloption, TestCafe ignores JavaScript errors on pages with URLs that match the regular expression:{ "skipJsErrors": { "pageUrl": /.*.*html/ } } - If you specify the
stackoption, TestCafe ignores JavaScript errors with call stacks that match the regular expression:{ "skipJsErrors": { "stack": /.*jquery.*/ig } } - Specify several arguments to skip errors that fit multiple criteria at once — for example, errors with a specific message and a specific call stack.
{
    "skipJsErrors": {
        "stack": "/.*jquery.*/",
        "message": "/.*User ID.*/ig"
    }
}
Use custom logic to skip JavaScript errors
Use a JavaScript configuration file to define a callback function with custom logic:
const callbackFunction = {
    fn:           ({ message }) => message.includes('User') || stack.includes('jquery');
};

module.exports = {
    skipJsErrors: callbackFunction,
};
CLI: -e, --skip-js-errors
API: runner.run({ skipJsErrors })
skipUncaughtErrors
Specify the skipUncaughtErrors parameter to ignore uncaught errors and unhandled promise rejections during test execution.
{
    "skipUncaughtErrors": true
}
CLI: -u, --skip-uncaught-errors
API: runner.run({ skipUncaughtErrors })
developmentMode
Specify the developmentMode parameter to generate TestCafe crash reports.
Note
TestCafe does not relaunch unresponsive browsers when you enable Development Mode.
{
    "developmentMode": true
}
CLI: --dev
API: createTestCafe
retryTestPages
If you enable the retryTestPages parameter, TestCafe performs up to 10 attempts to resolve unsuccessful network requests.
{
    "retryTestPages": true
}
This capability requires a secure network connection thanks to its use of Service Workers. To run TestCafe over a secure connection, set up HTTPS or use the --hostname localhost CLI option.
CLI: --retry-test-pages
API: createTestCafe
Timeouts
Main article: Adjust Timeouts
- selectorTimeout
- assertionTimeout
- pageLoadTimeout
- ajaxRequestTimeout
- pageRequestTimeout
- browserInitTimeout
- testExecutionTimeout
- runExecutionTimeout
selectorTimeout
Specify the selectorTimeout parameter to adjust the Selector Timeout (default: 10000 ms).
If TestCafe fails to resolve an element selector query within the Selector Timeout, the test fails.
{
    "selectorTimeout": 3000
}
CLI: --selector-timeout
API: runner.run({ selectorTimeout })
assertionTimeout
Specify the assertionTimeout parameter to adjust the Assertion Timeout (default: 3000 ms).
TestCafe executes compatible assertions multiple times within the Assertion Timeout, repeating measurements and calculations with each attempt. If an assertion does not succeed, the test fails.
{
    "assertionTimeout": 1000
}
CLI: --assertion-timeout
API: runner.run({ assertionTimeout })
pageLoadTimeout
Specify the pageLoadTimeout parameter to adjust the Page Load Timeout (default: 3000 ms).
TestCafe applies the Page Load Timeout when the user delays test execution until the window.loadEventRaised event. The timeout defines the maximum amount of time between the DOMContentLoaded event and the window.load event.
{
    "pageLoadTimeout": 1000
}
CLI: --page-load-timeout
API: runner.run({ pageLoadTimeout })
ajaxRequestTimeout
Note
Disable native automation to adjust the AJAX Request Timeout.
Specify the ajaxRequestTimeout parameter to adjust the AJAX Request Timeout (default: 120000 ms).
{
    "ajaxRequestTimeout": 40000
}
pageRequestTimeout
Note
Disable native automation to adjust the Page Request Timeout.
Specify the pageRequestTimeout parameter to adjust the Page Request Timeout (default: 25000 ms).
If the server does not fulfill a page request within the Page Request Timeout, the test fails.
Note
If you want to retry unsuccessful test page requests, set the Retry Test Pages parameter.
{
    "pageRequestTimeout": 8000
}
browserInitTimeout
Specify the browserInitTimeout parameter to adjust the Browser Initialization Timeout.
If one or more browsers fail to connect to TestCafe within the Browser Initialization Timeout, the test run fails.
{
    "browserInitTimeout": 180000
}
Default values:
120000for local browsers360000for remote browsers
CLI: --browser-init-timeout
API: runner.run({ browserInitTimeout })
testExecutionTimeout
Specify the testExecutionTimeout parameter to set a Test Execution Timeout.
When the total execution time of a test exceeds the Test Execution Timeout, TestCafe terminates the test, even if the browser is responsive.
{
    "testExecutionTimeout": 180000
}
runExecutionTimeout
Specify the runExecutionTimeout parameter to set a Run Execution Timeout.
When the total execution time of a run exceeds the Run Execution Timeout, TestCafe terminates the test run, even if the browsers are responsive.
{
    "runExecutionTimeout": 180000
}
Automation settings
- speed
- disableNativeAutomation
- port1, port2
- hostname
- proxy
- proxyBypass
- ssl
- cache
- disablePageCaching
- disableHttp2
speed
Specifies test execution speed.
Use the speed parameter to limit test execution speed. The parameter accepts values between 1 (the fastest speed, the default value) and 0.01 (the slowest speed).
{
    "speed": 0.1
}
Action-specific speed settings override the global test speed.
CLI: --speed
API: runner.run({ speed })
disableNativeAutomation
When you launch TestCafe v3.0.0 and up, the framework engages Native Automation mode to automate Chromium-based browsers with the native CDP protocol. Disable Native Automation to automate browsers with the TestCafe proxy.
Specify the disableNativeAutomation parameter to disable Native Automation.
Important
If you want to run tests in Chrome and other browsers, launch two instances of TestCafe — one with Native Automation, and one without:
testcafe chrome,edge test.js;
testcafe firefox,safari test.js --disable-native-automation
{
    "disableNativeAutomation": true
}
*CLI: --disable-native-automation
API: runner.run({ disableNativeAutomation: true; })
port1, port2
TestCafe automatically selects two open network ports to automate browsers and access cross-domain resources.
Specify the port1 and port2 parameters to manually select two ports in the [0—65535] range.
{
    "port1": 12345,
    "port2": 54321
}
CLI: --ports
API: createTestCafe
hostname
Note
Disable native automation to define a custom hostname.
Specify the hostname property to select the hostname of your machine for remote browser connections. If you do not specify this property, TestCafe detects your hostname and IP address.
{
    "hostname": "host.mycorp.com"
}
CLI: --hostname
API: createTestCafe
proxy
Note
If you run tests with native automation, use the built-in capabilities of your operating system to configure a proxy connection.
Specify the proxy parameter to access remote resources through a proxy.
{
    "proxy": "proxy.corp.mycompany.com"
}
{
    "proxy": "172.0.10.10:8080"
}
The value may include authentication credentials:
{
    "proxy": "username:password@proxy.mycorp.com"
}
CLI: --proxy
API: runner.useProxy
proxyBypass
Note
If you run tests with native automation, use the built-in capabilities of your operating system to configure a proxy connection.
Use the proxyBypass property to bypass the proxy when you load select resources.
The wildcard symbol (*) indicates variable URL parts. You can omit wildcards at the beginning and the end of the URL: *.mycorp.com and .mycorp.com are identical.
{
    "proxyBypass": "*.mycompany.com"
}
{
    "proxyBypass": ["localhost:8080", "internal-resource.corp.mycompany.com"]
}
CLI: --proxy-bypass
API: runner.useProxy
ssl
Important
Native Automation mode supports HTTPS and HTTP/2 websites out of the box. Use the ssl option to set up HTTPS testing with the TestCafe proxy.
To run the TestCafe Proxy over HTTPS, pass an object with HTTPS initialization options to the ssl property.
{
    "ssl": {
        "pfx": "path/to/file.pfx",
        "rejectUnauthorized": true
    }
}
CLI: --ssl
API: createTestCafe
cache
Specify the cache property to cache assets (such as stylesheets and scripts) when you load a web page for the first time.
When TestCafe accesses the page a second time, it pulls assets from its cache instead of requesting them from the server.
{
    "cache": true
}
TestCafe emulates the browser’s native caching behavior. For example, when TestCafe runs tests in Google Chrome, it only caches resources that Chrome itself would cache.
TestCafe caches scripts, stylesheets, fonts, and other assets up to 5 MB in size. TestCafe does not cache HTML because that could break user roles.
If the application relies on heavy remote assets, enable server-side caching to decrease test run time.
CLI: --cache
API: createTestCafe
disablePageCaching
Specify the disablePageCaching property to prohibit the browser from caching page content.
{
    "disablePageCaching": true
}
Users may inadvertently access cached pages that contain outdated automation scripts, for example, when they activate a Role. Specify the disablePageCaching parameter to prevent the browser from caching automation scripts.
For more information, see Troubleshooting: Test Actions Fail After Authentication.
You can disable page caching for an individual fixture or test.
CLI: --disable-page-caching
API:
disableHttp2
Use the disableHttp2 parameter to prohibit HTTP/2 network requests.
{
    "disableHttp2": true
}
CLI: --disable-http2
disableMultipleWindows
If multi-window tests cause crashes, disable support for multi-window testing with the disableMultipleWindows parameter.
{
    "disableMultipleWindows": true
}
CLI: --disable-multiple-windows
API: runner.run({ disableMultipleWindows })
esm
Imports ESM modules. Note that this option only works with Node.js 18.19-18.xx, 20.8.0 and up.
{
    "esm": true
}
CLI: --esm
API: runner.run({ esm })
TypeScript settings
Main article: TypeScript and CoffeeScript
The following parameter has been deprecated in TestCafe v1.10.0 and higher:
compilerOptions
Use the compilerOptions parameter to specify test compilation settings. The current version of TestCafe can only configure the TypeScript compiler.
{
    "compilerOptions": {
         "typescript": {
              "customCompilerModulePath": "path to custom Typescript compiler module",
              "options": { "experimentalDecorators": "true",  "newLine": "crlf"}
    }
}
Populate the typescript.options object with TypeScript compiler options.
Set the typescript.configPath option to load TypeScript compilation settings from a dedicated tsconfig.json file.
{
    "compilerOptions": {
         "typescript": { "configPath": "path-to-custom-ts-config.json"}
    }
}
Set the typescript.compilerModulePath option to load an external TypeScript compiler.
{
   "compilerOptions": {
       "typescript":   { "customCompilerModulePath": "path to custom Typescript compiler module" }
    }
}
Note
TestCafe resolves user-specified relative paths against the TestCafe installation folder.
CLI: --compiler-options
API: runner.compilerOptions
tsConfigPath (deprecated)
The tsConfigPath parameter has been deprecated in favor of the compilerOptions setting.
CLI: --ts-config-path
API: runner.tsConfigPath
User Variables
Specify the userVariables parameter to pass custom data to your tests.
Pass key-value pairs to the
userVariablesparameter.In the test file, import the
userVariablesobject from thetestcafemodule.
.testcaferc.json:
{
  "userVariables": {
    "url": "http://devexpress.github.io/testcafe/example",
  }
}
test.js:
const { userVariables } = require('testcafe');

fixture `Test user variables`
    .page(userVariables.url);

test('Type text', async t => {
    await t
        .typeText('#developer-name', 'John Smith')
        .click('#submit-button');
});
Client scripts
Main article: Inject Client Scripts
Specify the clientScripts parameter to inject custom JavaScript code into the browser.
The clientScripts parameter accepts the following options:
modulecontentpath
To specify more than one option, enclose options in an array. To limit the scope of the injection, specify the page attribute.
{
    "clientScripts": [
        {
            "module": "lodash", /* Insert an entire module.  */
            "page": "https://myapp.com/login/" /* Limit the injection to the login page. */
        },
        {
            "content": "Geolocation.prototype.getCurrentPosition = () => new Positon(0, 0);" /* Insert this particular line of JavaScript code. It works on all pages. */
        },
        {
            "path": "scripts/react-helpers.js", /* Insert a locally stored script. It works on all pages. */
        }
    ]
}
CLI: --cs, --client-scripts
API: runner.clientScripts
Custom Actions
Main article: Custom Test Actions
If you use a JavaScript configuration file, you can define custom TestCafe actions.
Pass the action definition function to the customActions configuration file parameter.
module.exports = {
  customActions: {
   async makeCoffee (...args) {
        await this.click();
    },
  }
};
Hooks
If you use a JavaScript configuration file, you can define global test hooks, request hooks, and reporter hooks.
Test hooks
Main article: Test Hooks
Use a JavaScript configuration file to define the following global hooks:
Test run hooks
Test run hooks run when you launch TestCafe and just before the TestCafe process terminates.
The following example declares a before test run hook and an after test run hook.
const utils = require('./my-utils.js');
const { admin } = require('roles');

module.exports = {
    hooks: {
        testRun: {
            before: async ctx => {
                ctx.serverId = 123;

                utils.launchServer(ctx.serverId);
            },
            after:  async ctx => {
                utils.terminateServer(ctx.serverId);
            }
        },
    }
};
Global fixture hooks
Global fixture hooks run before or after each of the fixtures in your test suite.
The following example declares a global before fixture hook and a global after fixture hook:
const utils = require('./my-utils.js');
const { admin } = require('roles');

module.exports = {
    hooks: {
        fixture: {
            before: async ctx => {
                ctx.dbName = 'users';

                utils.populateDb(ctx.dbName);
            },
            after:  async ctx => {
                utils.dropDb(ctx.dbName);
            },
        },
    }
};
Global test hooks
Global test hooks run before or after each of the tests in your test suite.
The following example declares a global before test hook and a global after test hook:
const utils = require('./my-utils.js');
const { admin } = require('roles');

module.exports = {
    hooks: {
        test:    {
            before: async t => {
                t.ctx = 'test data';

                await t.useRole(admin);
            },
            after:  async t => {
                await t.click('#delete-data');
                console.log(t.ctx); // > test data
            }
        }
    }
};
Request hooks
Main article: Intercept HTTP Requests
Use a JavaScript configuration file to define global RequestHooks, Request Loggers, and Request Mockers. TestCafe attaches global request hooks to your entire test suite.
The following example declares a global request hook:
const { RequestMock } = require('testcafe');

const mock = RequestMock()
    .onRequestTo('https://api.mycorp.com/users/id/135865')
    .respond({
        name: 'John Hearts',
        position: 'CTO',
    }, 200, { 'access-control-allow-origin': '*' })
    .onRequestTo(/internal.mycorp.com/)
    .respond(null, 404);

module.exports = {
    hooks: {
        request: mock,
    },
};
Reporter hooks
Main article: Modify Reporter Output
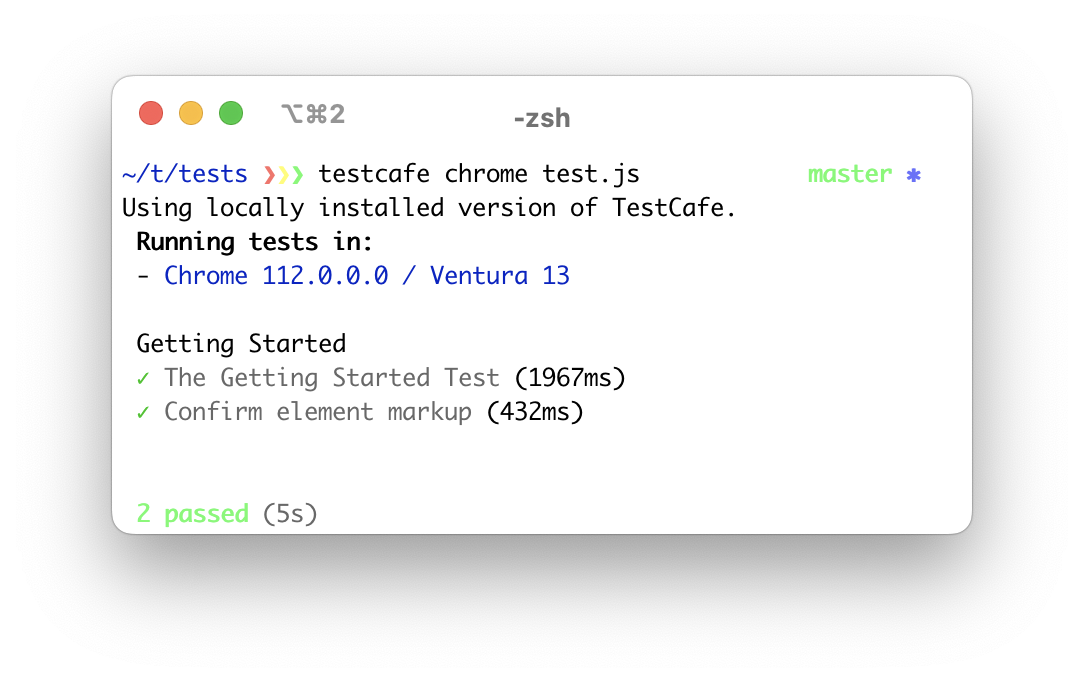
If you want to make minor changes to the output of an existing reporter, define an onBeforeWrite hook:
The following hook appends test duration to every test entry in the report:
//.testcaferc.js or .testcaferc.cjs
function onBeforeWriteHook(writeInfo) { // This function will fire every time the reporter calls the "write" method.
    if (writeInfo.initiator === 'reportTestDone') { // The "initiator" property contains the name of the reporter event that triggered the hook.
         const {
            name,
            testRunInfo,
            meta
        } = writeInfo.data || {}; // If you attached this hook to a compatible reporter (such as "spec" or "list"), the hook can process data related to the event.
        const testDuration = testRunInfo.durationMs; // Save the duration of the test.
        writeInfo.formattedText = writeInfo.formattedText + ' (' + testDuration + 'ms)'; // Add test duration to the reporter output.
    };
}

module.exports = { // Attach the hook
    hooks: {
        reporter: {
            onBeforeWrite: {
                'spec': onBeforeWriteHook, // This hook will fire when you use the default "spec" reporter.
            },
        },
    },
};
Initialization Settings
Main article: Execute shell commands on startup
appCommand
Use the appCommand property to execute a shell command on startup. TestCafe terminates this process when the test run is complete.
{
    "appCommand": "node server.js"
}
The appInitDelay property determines how long TestCafe waits for the resolution of the shell command (default: 1000 milliseconds).
Note
TestCafe adds the node_modules/.bin folder to the PATH environment variable. Do not use prefixes if you want to launch local dependency binaries.
CLI: -a, --app
API: runner.startApp
appInitDelay
Specifies the time (in milliseconds) between the execution of the appCommand shell command and the launch of the first test.
{
    "appCommand": "node server.js",
    "appInitDelay": 3000
}
Default value: 1000
CLI: --app-init-delay
API: runner.startApp
CLI Output settings
noColor
TestCafe uses multiple colors to format its CLI output. To disable this behavior, set the noColor parameter to true.
{
    "noColor": true
}
To override this configuration file parameter, use the --color CLI flag.
CLI: --no-color