Grant or Fix TestCafe Permissions on macOS
Important
This article describes TestCafe v1.18 and up. If you encountered permission-related issues with an earlier version of the framework, update TestCafe, and then read the Fix System Permissions section of the guide.
TestCafe includes an automation engine called “TestCafe Browser Tools”. This engine automates browsers and handles screen capture.
To function, the TestCafe Browser Tools binary requires high-level system privileges.
Due to security enhancements in macOS 10.15 Catalina, the process of obtaining system permissions has become more complicated. This article explains how to grant TestCafe the permissions it needs, and what to do when things go wrong.
- Grant system permissions to TestCafe (Clean Install)
- Fix System Permissions
- Potential Installation Conflicts
- Troubleshooting Tips
Grant system permissions to TestCafe (Clean Install)
Follow these instructions if you have a new installation of TestCafe.
Step 1. Run TestCafe
Launch TestCafe. If you don’t have a TestCafe test on hand, launch the sample test from the Getting Started tutorial.
testcafe all test.js
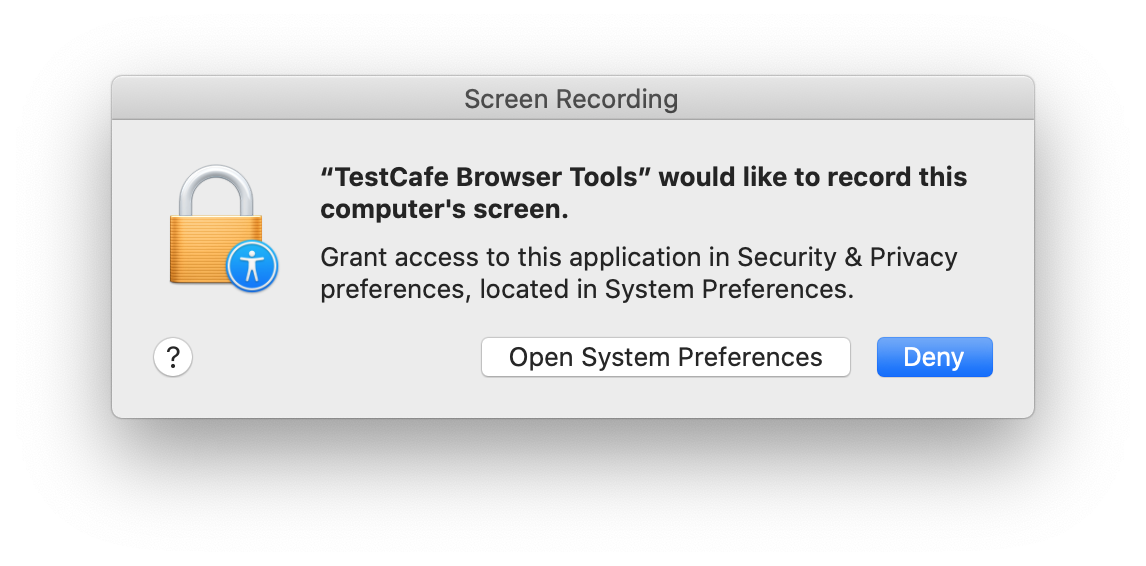
Since you haven’t granted any permissions to TestCafe, the test will fail, and the operating system will open the following dialog:

Step 2. Grant system-level permissions

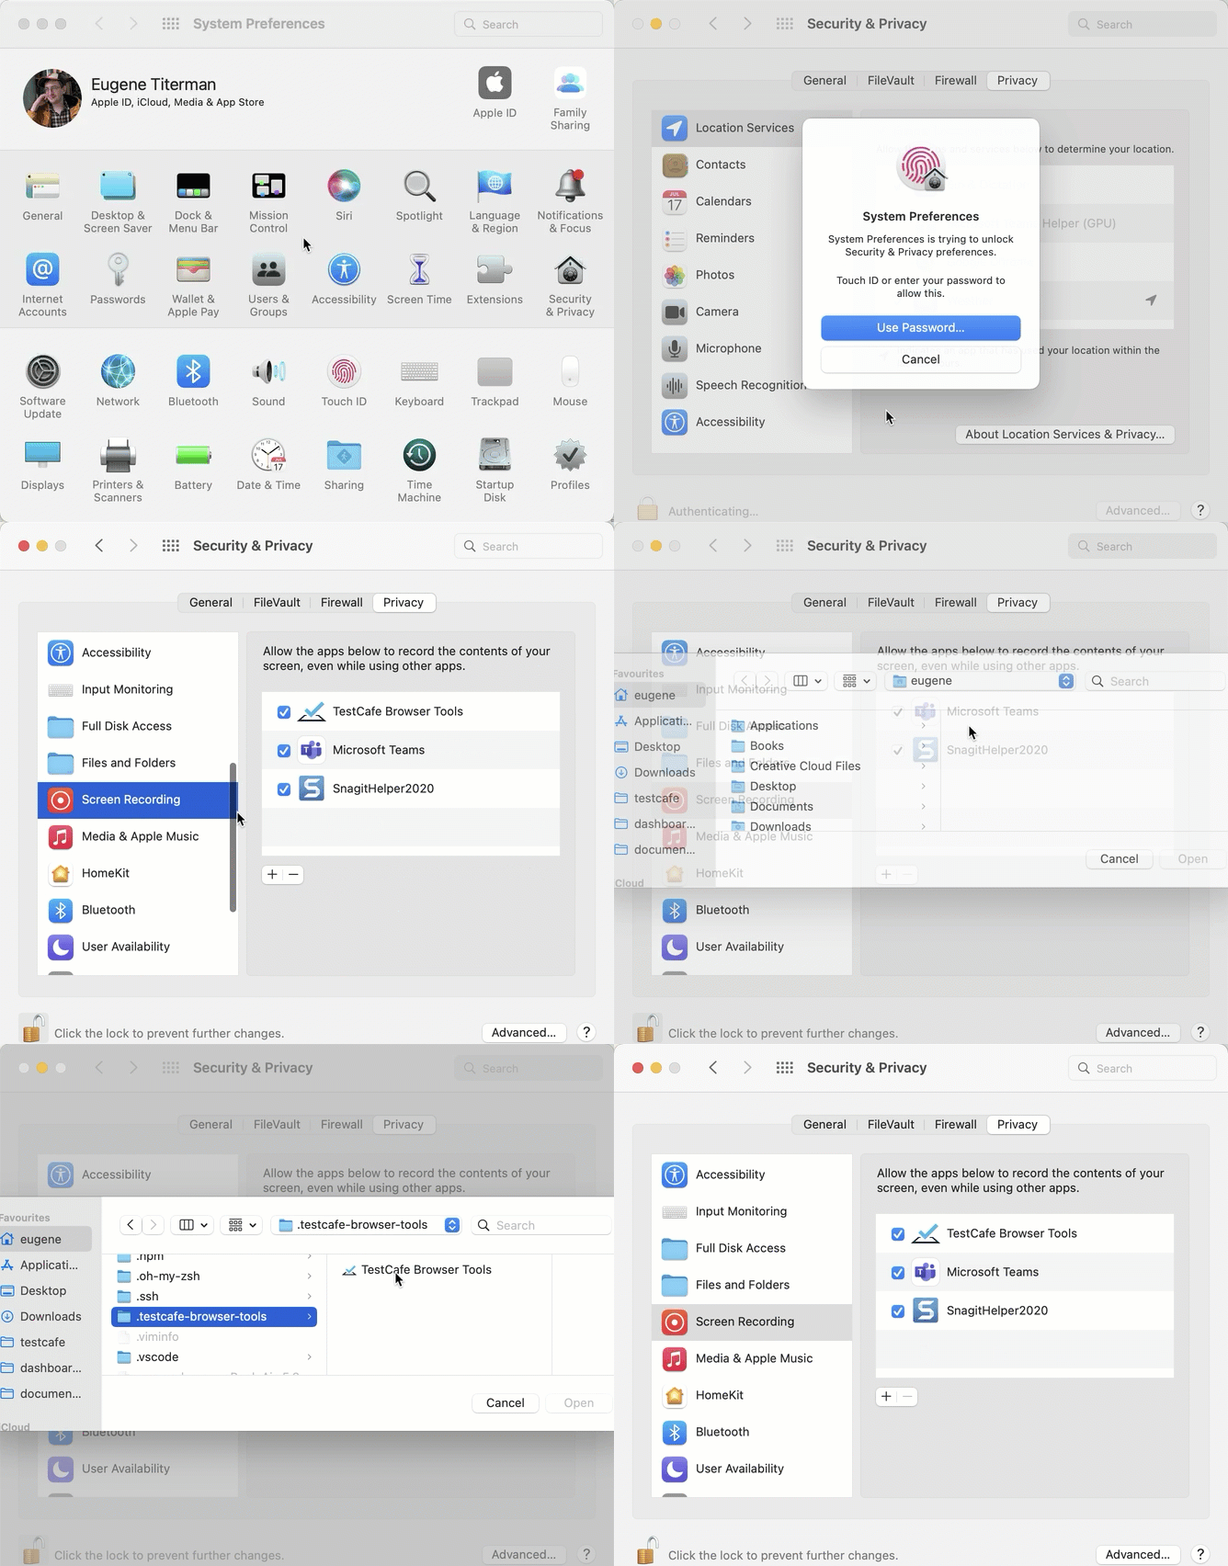
- Open the “Security and Privacy” pane of the “System Preferences” dialog.
- Click the lock at the bottom left of the dialog. Log in when the system prompts you.
- Select the “Screen Recording” item in the “Privacy” tab sidebar.
- Click the “+” button to add a new entry.
- Navigate to your home folder. Press
"Cmd"+"Shift"+"."to view hidden files and folders. - Enter the
.testcafe-browser-toolsfolder and select the TestCafe Browser Tools application.
Step 3. Grant browser-level permissions
By now, you should have already granted the necessary system-wide permissions to TestCafe. Launch a test to confirm that it doesn’t yield an error:
testcafe all test.js
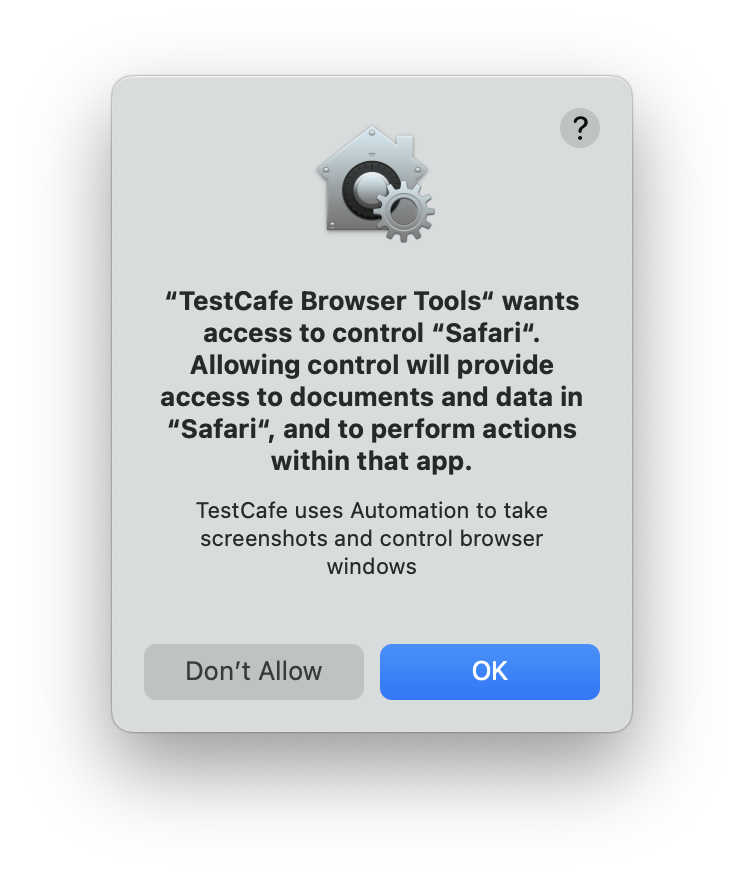
Whenever you launch TestCafe in a new browser, the framework requests permission to automate that browser. Press “OK” to launch the test.

Fix System Permissions
Step 1. Reset Application Permissions
- Execute the following shell command to reset screen recording permissions:
tccutil reset ScreenCapture com.devexpress.testcafe-browser-tools
- Execute the following shell command to reset automation permissions:
tccutil reset AppleEvents com.devexpress.testcafe-browser-tools
Step 2. Run TestCafe
Launch TestCafe. If you don’t have a TestCafe test on hand, launch the sample test from the Getting Started tutorial.
testcafe all test.js
Since you just revoked all TestCafe permissions, the test will fail, and the operating system will open the following dialog:

Step 2. Restore system-level permissions
- Open the “Security and Privacy” pane of the “System Preferences” dialog.
- Click the lock at the bottom left of the dialog. Log in when the system prompts you.
- Select the “Screen Recording” item in the “Privacy” tab sidebar.
Look at the list of applications with Screen Recording permissions. If the list includes a “TestCafe Browser Tools” entry, remove the old entry:
- Select the “TestCafe Browser Tools” entry.
Press the “-“ button below the list to remove the entry.
Warning
If you only remove the checkmark next to the entry, you won’t be able to complete the tutorial.
Click the “+” button to add a new entry.
- Navigate to your home folder. Press
"Cmd"+"Shift"+"."to view hidden files and folders. - Enter the
.testcafe-browser-toolsfolder and select the TestCafe Browser Tools application.
Step 3. Restore browser-level permissions
Launch a test to confirm that TestCafe doesn’t yield an error:
testcafe all test.js
Whenever you launch TestCafe in a new browser, the framework requests permission to automate that browser. Press “OK” in the permissions dialog:

Potential Installation Conflicts
It is common to have multiple Testcafe installations per machine, even if this is unintentional. For example, if you use TestCafe Studio alongside the open-source version of the framework, you have at least two different installations of TestCafe. Others may have a local installation of the framework inside their test suite project, but use a global installation in other cases.
If you run TestCafe 1.18 or up, the number of TestCafe instances on your machine does not matter. All installations of the framework share a single TestCafe Browser Tools binary. TestCafe stores this binary in the user’s Home directory, inside the hidden ~/.testcafe-browser-tools folder.
If you run an earlier version of the framework, update TestCafe before you troubleshoot system permissions.
npm i -g testcafe
Read the TestCafe 2.0 migration guide for more information.
Troubleshooting Tips
- Do not uncheck the TestCafe Browser Tools entry when you reset system-level permissions. Remove the entry altogether.
- If you run a local version of TestCafe, and could not fix the permissions with the help of the tutorial, reinstall TestCafe from scratch:
- Uninstall the local
testcafepackage and remove it from your project’s dependencies:npm uninstall -D testcafe - Uninstall the global
testcafepackage to avoid potential conflicts:npm uninstall -g testcafe - Purge the
node_modulesfolder of testcafe-related libraries:rm -rf ./node_modules/testcafe* - Delete the global
.testcafe-browser-toolsfolder if it exists:rm -rf ~/.testcafe-browser-tools - Confirm that the uninstallation is successful:
npm list testcafe # Should yield an empty listwhich testcafe # Should yield an error message - Re-install the TestCafe package:
npm i testcafe --save-dev - Follow the instructions in the first part of this article.
- Uninstall the local
- If you run a local version of TestCafe, your project should contain its own copy of the TestCafe Browser Tools binary. This binary is located in the
node_modules/testcafe-browser-tools/bin/macfolder. If no other strategy helps, select that binary instead of the global binary when you grant system-level permissions to TestCafe. Thanks to @liront2 on GitHub for the tip!